How to pass host device to podman container in user mode using podman-compose

One of the main ideas of containerization is a way to achieve repeatable, hassle-free results. So, when I see headlines that podman gives the same experience and supports docker-compose like deployments (or even provides socket for native docker-compose), I expect that I can grab someone else’s docker-compose file, run $ podman-compose up and enjoy working installation of something. But it’s a trap.

In theory, if you leave service state management out of the equation, it works, but only if the payload doesn’t need access to devices, privileged ports, and you don’t need to organize interpods file sharing or sharing files between the host and pods.

Nevertheless, from time to time when I install a new host with the intention to use containers, I give podman a try as the “new shiny better” alternative to docker. I allocate time (like one evening), and if I’m unable to make it work as I need, I purge it and fall back to docker.

The last time I wanted to run prind in podman, my idea was:

  1. Create separate user
  2. Add it to dialout and video groups on the host system
  3. Run services in user-mode with podman-compose

Looks simple, right? But not in the case of podman.
First of all, device pass-thru doesn’t work in user mode, so if you want to use podman’s --device option, or device: section of compose file, you have to run it under root, which immediately wipes out a major part of podman’s advantages.
Second, podman uses user namespaces, uids:gids which  you see in a container not the same as in a host system. Because of that you may have user root in container which started by regular user, but in fact uids:gids will be offset to a host system by values configured in /etc/{subuid,subgid}, which means that even you have video group in the container, it will be different from the video group that the host system user may be a member of.
Because of that, my first two steps of the plan don’t work out of the box.

To counter that, quite recently, podman has an elegant and beautiful solution: you should add a group named keep-groups to the container with the --group-add option. So, here it is? You just add the group keep-groups to the groups section of the compose file? End of the story? Everything works as expected and everyone is happy? Nope!

For some reason it doesn’t work (at least in debian’s podman-compose 1.0.6-1~bpo12+1). But before this masterpiece was born, the same effect may be achieved with --annotation run.oci.keep_original_groups=1 and it works with compose. You need to mount volume /dev and add the next section:

services:
klipper:
...
volumes:
- /dev:/dev
annotations:
run.oci.keep_original_groups: 1
...

It makes groups looks weird and counter-intuitive in containers and forbids you adding new groups with `groups:` section, but it’s better than nothing:

print3d@aurora:~$ id
uid=1001(print3d) gid=1001(print3d) groups=1001(print3d),20(dialout),44(video),100(users)
print3d@aurora:~$ podman run --group-add keep-groups -v /dev:/dev -it m5p3nc3r/v4l-utils
✔ docker.io/m5p3nc3r/v4l-utils:latest
Trying to pull docker.io/m5p3nc3r/v4l-utils:latest...
Getting image source signatures
Copying blob 366c4c59e228 done
Copying blob 5843afab3874 done
Copying config 13e86697f5 done
Writing manifest to image destination
Storing signatures
/ # id
uid=0(root) gid=0(root) groups=65534(nobody),65534(nobody),65534(nobody),0(root)
/ # ls -l /dev/{ttyUSB1,video0}
ls: /dev/{ttyUSB1,video0}: No such file or directory
/ # ls -ln /dev/ttyUSB1
crw-rw---- 1 65534 65534 188, 1 Dec 26 15:26 /dev/ttyUSB1
/ # ls -ln /dev/video0
crw-rw---- 1 65534 65534 81, 0 Dec 17 15:01 /dev/video0
/ # v4l2-ctl --list-devices
UVC Camera (046d:0825) (usb-0000:04:00.3-5):
/dev/video0
/dev/video1
/dev/media0

Make xerox b215 work with samba 4 again

Recently I bought xerox b215 (if you can, buy something other than xerox or hp) and wanted to make it scan to smb share. I already had configured samba in container using servercontainers/samba image.
So, it’s just to add another new share and configure user for scanner, right? Wrong!
It’ just didn’t worked. Thanks xerox’s engineers who decided not to burden end-user with diagnostic messages. It started scanning and after a second  returned back to the scan screen. Samba with log level 10 didn’t help me too, I just saw that client tried to connect and that all.
The tool which helped me is wireshark, I’ve found that after NTLMSSP_AUTH request from scanner samba sends STATUS_LOGON_FAILURE.

A little bit of “letsgoogleit” and voila ntlm auth = ntlmv1-permitted allowed me not to configure FTP for that lovely xerox.

Lenovo battery hack and whitelist at the same time

Recently I’ve got x230 laptop and have a plan to change buggy Intel Centrino 6205 adapter to something like Atheros, also I decided that it’s worth to have ability to use x220 like batteries, just in case.
To achieve that, I needed to flash patched firmware for EC controller (thinkpad-ec project) and modified bios (1vyrain project), but it was confusing, what should go first? Firstly I didn’t realised that thinkpad-ec flashes only EC firmware, it looked like EC mod will update bios to newer version than supported by 1vyrain, same time 1vyrain would update bios to version newer than supported by thinpkad-ec.
Finally, here is how to have EC mod together with patched BIOS on x230 laptop:
1. BIOS should be old enough to be compatible with  1vyrain and thinpkad-ec, at 2020-03-22 it should be not newer than 2.60 (1vyrain has requirements of more older bios than thinkpad-ec, requirements for 1vyrain patch can be found here)  otherwise it should be downgraded as described here.
2. Make bootable device with thinkpad-ec image, in BIOS set boot mode to ‘Legacy’ and update EC firmware.
3. Make bootable device with 1vyrain image, in BIOS set boot mode “UEFI only”, disable “Secure boot” and update BIOS.

In my case I ended with BIOS version 2.77 EC version 1.14.

How to just send logs from files to graylog2

That solution allows to read logs from file and just send them to remote syslog/graylog server. Logs will not influent on current syslog settings, you won’t need to filter them out of any syslog facility (like local7), all you need – the rsyslog (I’ve used v8).

My task was to send logs which wrote by java application (if I’m right log4j was used), they were rotated by logrotate with truncation, so few specific options were added.
I replaced %APP-NAME% in rsyslog’s template(RSYSLOG_SyslogProtocol23Format) to be able differentiate from which files log messages were read.

As for me, it’s better to write logs in format which allow them to be parsed easily or send them right to remote location , but if you need to do it quickly without modification of application it’s appropriate solution. Just copy config below in file like  /etc/rsyslog.d/99-graylog.conf and modify TARGET.ADDRESS, TARGET.PORT, app_ tag and File setting according to your environment.

module(load="imfile")

template(
name="SyslogProtocol23Format_modified" type="string"
string="<%PRI%>1 %TIMESTAMP:::date-rfc3339% %HOSTNAME% %syslogtag%%$.suffix% %PROCID% %MSGID% %STRUCTURED-DATA% %msg%\n"
)

ruleset(name="sendToLogserver") {
action(type="omfwd" Target="TARGET.ADDRESS" Port="TARGET.PORT" Template="SyslogProtocol23Format_modified")
}

ruleset(name="app_logs") {
set $.suffix=re_extract($!metadata!filename, "(.*)/([^/]*)", 0, 2, "unknown.log");
call sendToLogserver
stop
}

input(
type="imfile"
File="/var/log/app_logs/*.log"
Tag="app_"
Ruleset="app_logs"
freshStartTail="on"
addMetadata="on"
)

In my case application wrote multi-line log messages, so startmsg.regex was used. Also logs were rotated by logrotate with truncate method, additional option reopenOnTruncate was used. So my input section looked like:

input(
type="imfile"
File="/var/log/app_logs/*.log"
Tag="app_"
Ruleset="app_logs"
freshStartTail="on"
addMetadata="on"
startmsg.regex="^[0-9]{4}-[0-9]{2}-[0-9]{2} "
reopenOnTruncate="on"
)

Fixing startup error of STMCubeMX on linux

After STMCubeMX was upgraded from version 4 to version 5, it can’t start. I’ve tried to reinstall it, but without result. Last messages in console after application stuck looks like:

2019-01-24 21:03:54,692 [INFO] PluginManage:339 - Loaded plugin projectmanager (category:projectmanager,tabindex:3)
2019-01-24 21:04:38,908 [ERROR] IntegrityCheckThread:90 - Cannot obtain updater plugin
2019-01-24 21:04:38,909 [INFO] IntegrityCheckThread:94 - End integrity checks thread
2019-01-24 21:04:38,909 [INFO] ThirdPartyDb:263 - Close Third Party DataBase File (/home/bob/.stm32cubemx/plugins/thirdparty/db/thirdparties_db.xml)

Same time java processes looks like:

bob 20652 102 1.5 5841340 127888 pts/3 Sl+ 21:03 2:41 java -jar STM32CubeMX
bob 20653 0.0 0.0 0 0 pts/3 Z+ 21:03 0:00 [STM32CubeMX] <defunct>

On the st forum I’ve found solution which had helped me, if you change tabindex parameter of com/st/microxplorer/plugins/tools/Plugin.properties in tools.jar to 6, STMCube will start to work.
Here is modified tools.jar

Fixing Gutenberg error “The editor has encountered an unexpected error”

After update to WP 5, I’ve faced with next issue, I’ve couldn’t add new post or edit existed. Looks like error happens because of misconfigured nginx and when new ‘Gutenberg’ editor is active (which is true by default for wordpress 5.0 and above).

Earlier I had nginx location / configured in next manner:

location / {
    try_files $uri $uri/ /index.php?$args;
}

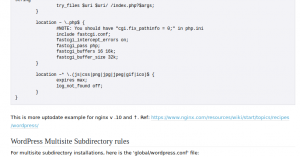
Same configuration can be found on wordpress codex page:

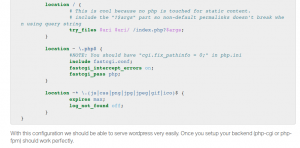
And on nginx recipe page:

The issue caused by question sign in try_files directive, when $args is empty, index.php is called like this: “/index.php?”. Solution is simple:

$is_args
    “?” if a request line has arguments, or an empty string otherwise

After I changed location / block like this:

location / {
    try_files $uri $uri/ /index.php$is_args$args;
}

The problem is gone.

How to configure redmine service via terraform with persistent storage on amazon ECS

First of all, I have very little experience of AWS and terraform, so it can be obviously for them who have enough experience, but it definitely saved me a lot of time if I found article like that early.

It wasn’t simple to figure out how to run redmine container on ECS.
The main problem was – persistent storage. Redmine suppose that it have persistent disk storage which remain the same between service restarts. If you have your docker host it’s simply to map hipervisor’s directory inside of the container, but when your docker nodes can be added and removed dynamically you can lost data on disk which was generated by app.
Amazon provide few ways to have persistent storage such as S3, EBS or EFS.

By nature S3 is a storage which accessibly over http, so if your app haven’t integration with S3 API it can’t be used (except when you mount S3 via fuse fs for example).
EBS is a remote block storage, so you need to connect block device to docker host, mount it and map inside container before you will be able to use it.
EFS by nature is just a NFS.

I wanted to find solution which will be most natural as possible. I wanted to keep docker and redmine image untouched (ie avoid of additional plugins/scripts/packages installation). So, I decided not to use S3, because it need something like s3fs to make S3 storage available for redmine.
I decided not to use EBS, because I’ve found reports when EBS stuck attached to host and can’t be re-attached to another host until initial host reboots.
EFS looked perfect, it could be mounted from different hosts, it kept data during application/hypervisor life cycles. Moreover, even if I didn’t find a simple way to use EFS, only thing I needed was nfs-common package.

I was lucky, because at the Aug of 2018 amazon announced support of docker volumes and docker volumes plugins, docker itself can mount NFS inside containers since version 17.06 (I couldn’t found it in the change log, but if you google it, you will found a lot of references to that). So, it was exactly what I wanted, I faced only with one cons – lack of documentation. I needed to use terraform for redmine configuration and its documentation didn’t specify how to exactly pass driver_opts to docker volume configuration, so here is solution:

First you need to specify mount point in task-definition.json

"mountPoints":[
     {
       "sourceVolume": "redmine_storage",
       "containerPath": "/usr/src/redmine/files"
     }
 ]

And here is volume block from from terraform code for volume specification:

volume {
    name = "redmine_storage"
    docker_volume_configuration {
        scope         = "task"
        driver      = "local"
        driver_opts = {
            "type" = "nfs"
            "device" = "${var.efs_dns}:/"
            "o" = "addr=${var.efs_dns},nfsvers=4.1,rsize=1048576,wsize=1048576,hard,timeo=600,retrans=2"
        }
 }
}

That’s all.
Code above is a part of redmine module, which have input variable efs_dns , so you can put your EFS address here if you configured it manually.

PS
Here you can find redmine S3 plugin, but I wanted to migrate existing redmine, so it looked like a lot of work, because I needed to modify rdemine’s DB and put files on S3 in manner which that plugin expects, so I decided that S3 not an option.

How to block IP ranges of specified autonomous system

If you want to prohibit access to your host for specified AS, you can use solution below. I made it some time ago, when I found out, that mail.ru hunting for hosts which help to bypass telegram censorship. It’s not perfect because I didn’t make much effort to it. Whois can return sub-networks and networks to which they belong in same response, so ipset set can contain duplicated ranges. Change ‘AS47764’ to AS which you want to block, ‘input_drop’ is an ipset set name.

ipset create input_drop hash:net comment
for i in $(whois -h whois.radb.net -- '-i origin AS47764' | grep 'route:'|cut -d : -f 2)
do
ipset add input_drop $i comment mail.ru
done
iptables -A INPUT -m set --match-set input_drop src -m comment --comment "DROP INPUT packets for AS47764" -j DROP

Also, i would recommend that solution, to make ipset rules persistent: https://github.com/BroHui/systemd-ipset-service

Galaxy S3: /efs/prox_cal doesn’t affect calibration settings under LineageOS

Few days ago I replaced front glass on samsung i9300 and flashed LineageOS 14.1. After that I’ve found that proximity sensor stays in triggered state, it may happened because of lack of experience (I’ve used too much UV-glue, so it was everywhere) or because of additional screen protector which been installed. Anyway, always-triggered-proximity-sensor made phone partially usable (you can’t cancel any call without pushing power button few times). I’ve found a lot of articles how to calibrate proximity sensor like this one. More over I’ve found that I shouldn’t do any calculation to update /efs/prox_cal, after auto-calibration /efs/prox_cal updated automatically (at least with kernel that shipped by default), but anyway it didn’t help me. Every reboot calibration  was reseted to zero.

For a first time, I’ve used proximity threshold value to fix proximity sensor, but later I saw that kernel driver read calibration directly from file and SELinux could be a reason why /efs/prox_cal haven’t effect.

Part that read calibration value looks like that:

#define CANCELATION_FILE_PATH "/efs/prox_cal"
...
int proximity_open_calibration(struct ssp_data *data)
{
 int iRet = 0;
 mm_segment_t old_fs;
 struct file *cancel_filp = NULL;
 
old_fs = get_fs();
 set_fs(KERNEL_DS);
 
cancel_filp = filp_open(CANCELATION_FILE_PATH, O_RDONLY, 0666);
 if (IS_ERR(cancel_filp)) {
 iRet = PTR_ERR(cancel_filp);
 if (iRet != -ENOENT)
 pr_err("[SSP]: %s - Can't open cancelation file\n",
 __func__);
 set_fs(old_fs);
 goto exit;
}

I’ve checked logcat and here is it:

05-06 21:29:12.916 3219 3219 W Binder:2377_A: type=1400 audit(0.0:39): avc: denied { read } for name="prox_cal" dev=mmcblk0p3 ino=46 scontext=u:r:system_server:s0 tcontext=u:object_r:efs_device_file:s0 tclass=file permissive=0

Definitely SELinux forbid reading of calibration file, I was surprised that SElinux capable to forbid kernel read call and now I feel a shame because usually I just disable it.

First I wanted to create new policy to allow reading of that file for kernel, but later I’ve found that /efs partition contains other calibration files, for example /efs/gyro_cal_data, I’ve checked security context of that files and found that it differs from /efs/prox_cal, it was u:object_r:sensors_data_file:s0 but prox_cal was created with default for /efs partition context u:object_r:efs_file:s0, so I’ve changed context:

# chcon u:object_r:sensors_data_file:s0 /efs/prox_cal

After that kernel started to load calibration value every boot. Looks like instructions like one mentioned above works for everyone who modified factory shipped prox_cal file with right security context, but I haven’t /efs/prox_cal before and it was created with wrong context.
I hope that story may help someone.

How to update puppet 3 to puppet 4 on ubuntu 16

I spent near month to figured out why i can’t update puppet on ubuntu 16 with specially designed puppet_agent module. It was task full of confusing experience.

So, let’s start. For a beginning you shouldn’t debug update process from a console, because one of a bug related to puppet  service. You could solve all problem which you will found with ‘puppet agent -t’ but when you will try  to upgrade puppet when it daemonized, it will fail. So set ‘log_level=info’ in your puppet.conf and use kill to trigger puppet daemon.

 sudo kill -SIGUSR1 $(cat /var/run/puppet/agent.pid);

Next you should set ‘stringify_facts=false’ into puppet.conf. Now puppet_agent developers declared that they provide additional class ‘::puppet_agent::prepare::stringify_facts’ for that, but when i started upgrade procedure it wasn’t available (or i miss it), so here is external fact to provide stringify_facts settings and puppet.conf path:

require 'puppet'
 
Facter.add('puppet_config') do
 setcode do
 Puppet.settings['config']
 end
end
 
Facter.add('puppet_stringify_facts') do
 setcode do
 Puppet.settings['stringify_facts'] || false
 end
end

Call it something like puppet.rb and put it into <YOURMODULEDIR>/lib/facter.
Next puppet code will disable stringify_facts before doing upgrade:

if versioncmp($::clientversion, '4') < 0 {
 if $::puppet_stringify_facts {
 augeas { 'puppet.conf.stringify_facts':
 context => "/files${::puppet_config}/main",
 changes => [
 'set stringify_facts false',
 ],
 }
 } else {
<Do puppet upgrade here>
}

If you have puppet service defined somewhere, you will be faced with duplicate service declaration:

Feb 16 09:09:59 localhost puppet-agent[10026]: Could not retrieve catalog from remote server: Error 500 on SERVER: {"message":"Server Error: Evaluation Error: Error while evaluating a Resource Statement, Evaluation Error: Error while evaluating a Resource Statement, Duplicate declaration: Service[puppet] is already declared in file CUT:47; cannot redeclare at /etc/puppetlabs/code/environments/production_puppet4/modules/puppet_agent/manifests/service.pp:31 at /etc/puppetlabs/code/environments/production_puppet4/modules/puppet_agent/manifests/service.pp:31:7 on node llocalhost","issue_kind":"RUNTIME_ERROR","stacktrace":["Warning: The 'stacktrace' property is deprecated and will be removed in a future version of Puppet. For security reasons, stacktraces are not returned with Puppet HTTP Error responses."]}

So you should declare puppet_agent class in next maner:

 class {'::puppet_agent':
 collection => 'PC1',
 service_names => [],
 notify => Service['puppet']
 }

Interesting what will happens now if you will try to update puppet?

Feb 16 09:16:32 localhost puppet-agent[10474]: Caught TERM; exiting
Feb 16 09:16:32 localhost puppet-agent[8171]: Caught TERM; exiting
Feb 16 09:16:32 localhost systemd[1]: Stopping Puppet agent...
Feb 16 09:16:36 localhost systemd[1]: Stopped Puppet agent.

Tadaaam. Now you have barely installed puppet-agent package, deleted previous puppet package and killed puppet daemon:

ichurkin@localhost:~$ pgrep -f puppet
ichurkin@localhost:~$ dpkg -l|grep puppet
rF puppet 3.8.5-2 all configuration management system, agent
ii puppet-common 3.8.5-2 all configuration management system

It happens because during puppet-agent package installation systemd killed puppet daemon and all its children. So you need to fix unit file first:

[Service]
KillMode=process

Call it something like service.override.conf and put into <YOURMODULEDIR>/files, puppet code to fix that:

if $::os['name'] == 'Ubuntu' and versioncmp($::os['release']['major'], '16') >= 0 {
notify{ "Creating systemd ovveride file":}
 file {'/etc/systemd/system/puppet.service.d/':
 ensure => directory
 }~>
 file { '/etc/systemd/system/puppet.service.d/override.conf':
 mode => '0644',
 owner => 'root',
 group => 'root',
 source => 'puppet:///modules/puppet/puppet.service.override',
 }~>
 exec { 'systemd_reload':
 command => 'systemctl daemon-reload',
 path => [ '/usr/bin', '/bin', '/sbin', '/usr/sbin' ],
 refreshonly => true,
 before => Class['::puppet_agent']
 }

I tried to use fact ${::service_provider} instead of ugly os/release condition, but at least puppet 3.8 on ubuntu 16 return ‘debian’ instead of ‘systemd’.

Let’s update puppet?

Feb 16 04:49:14 localhost puppet-agent[10021]: Could not start Service[puppet]: Execution of '/usr/sbin/service puppet start' returned 1: Failed to start puppet.service: Unit puppet.service is masked.
Feb 16 04:49:14 localhost puppet-agent[10021]: (/Stage[main]/Puppet_agent::Service/Service[puppet]/ensure) change from stopped to running failed: Could not start Service[puppet]: Execution of '/usr/sbin/service puppet start' returned 1: Failed to start puppet.service: Unit puppet.service is masked.

Once again puppet render itself stopped, i think it may caused because service provider is debian instead of systemd, i too exhausted to search for right solution, so here another one dirty hack:

 exec { 'puppetagent_transition_restart':
 path => '/bin:/sbin:/usr/bin:/usr/sbin',
 command => '/opt/puppetlabs/bin/puppet resource service puppet enable=true ensure=running',
 require => Class['::puppet_agent']
 }

That’s all.

PS

List of related bugs below:
https://tickets.puppetlabs.com/browse/MODULES-3453
https://tickets.puppetlabs.com/browse/PUP-5637
https://tickets.puppetlabs.com/browse/PUP-3931
https://github.com/puppetlabs/puppet/pull/3699
https://github.com/puppetlabs/puppet/pull/3700
https://tickets.puppetlabs.com/browse/PUP-4512